Evidently to quench the famous WordPress CMS installation process, this quick guide should prove helpful to beginners and newbies. This brief and sweet guide will tour you with detailed instructions on how to manually install WordPress on your hosting account.
To start with, aptly follow the steps given as below.
Let’s begin.
1. Firstly, download the latest installation package from WordPress’s official site only. It is not at all recommended to visit other sites and download the installation package from there. (you can download wordpress latest version from below)
https://wordpress.org/

It is a clean site and clearly shows the ‘Download WordPress’ button, just hit it and it will start installing the latest installation package in zip format on your PC. Once downloaded, simply extract the zip package to a new folder.
This was easy !
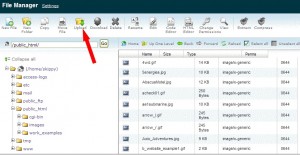
2. Let’s move on and upload all the extracted files and folder to your host server for further process. Either utilize FTP or File Manager in cPanel and start uploading.
Note: One important thing to remember here, if you want WordPress as the prime installation, then all the extracted contents (NOT the ‘new’ folder itself) should be uploaded to and reside under public_html. Nevertheless, in case you only wish to have a blog or partial WordPress to your main domain/site, then simply create a sub-folder as like public_html/blog and upload the extracted files to it.
Easy! Isn’t it
3. The third step is to create MySQL Database and User for WordPress. Under cPanel, the option MySQL Database Wizard under Databases section should be utilized to create database and assign a user to it; make sure to assign full permissions to the user. We will need all of the information in the next step so, note down the details.
Wasn’t that hard !

4. Now let’s jump into the actual installation process!
If you prefer and uploaded WordPress in the public_html directory, then browse http://yourdomain.com or else, browse the subfolder i.e., http://yourdomain.com/blog (as named). The page will open up with a message notifying about no wp-config.php file present. Don’t worry! On the same page lies the option ‘Create a Configuration File’ button. Click on it and it will navigate to the next page instructing to gather all the necessary information to make a successful installation. Read it and keep the asked information ready that we used to create MySQL database in the last step. Ready? Hit the ‘Let’s go!’ button.
5. The next page will load and you will now need to enter the details of MySQL database we created in step 3. Just hit the ‘Submit’ button after filling up the details.
Let WordPress verify the entered details and it will come up with the confirmation page. Hit ‘Run the Install’ option in order to have WordPress load the next page.
Great!
6. The next page asks for the title of the new site along with the administrator username, password, email id and whether you would like to allow search engines to index the site. Enter all the details and hit the ‘Install WordPress’ button.
7. Excellent !! You have successfully installed WordPress on your site. The confirmation screen will appear and you can press the ‘Log In’ button to access your administrative area in order to install plugins, themes or directly start posting.
The either way to install WordPress is by using Softaculous or Fantastico in cPanel. Your host server requires them installed on the server and enabled in your cPanel for utilization.